Tuesday, March 3, 2015

Turn your soil into Gold with Composting

tips for improving your garden soil

The single most important component to a successful and vivacious garden is having healthy soil, rich in nutrients, microorganisms, and organic matter. Over time, by using proper amendments, you can transform even the lousiest dirt into healthy, humus-rich soil.  And healthy soil is truly a gardener's gold!  

First and foremost, let's get this straight--plants don't just need water to grow, they need nutrients and minerals found in healthy soil.  Unless you reside somewhere with incredibly fertile ground, you will most likely have to put forth consistent effort to maintain all of these necessary soil nutrients.  To give you a little background about what nutrients constitute healthy soil, here's an infographic about the chemistry of healthy soil:

science of garden soil, components of garden soil

Of all of the components listed above, there is only one component that encompasses all the others--Organic Matter.  By organic matter, I mean organic materials (kitchen scraps, manures, yard clippings, fallen leaves, shredded paper, etc) that have been composted or decomposed into a microbe-rich humus.  As organic matter is further degraded in the soil, it slowly releases nitrogen,  phosphorous, potassium, and trace elements.  It releases these nutrients at a slow enough pace to prevent your garden crops from becoming over-fertilized, which can often occur if you apply commercially-prepared applications of N-P-K (nitrogen-phosphorous-potassium) fertilizers.

In addition to providing the elements essential to growth in your garden, organic matter:

1. Improves the texture of your garden soil

If you have really sandy or really clay-like soils, the addition of organic matter can improve soil texture and make it more loamy.  It can help sandy soils retain more water and nutrients, and it can help clay soils become looser and more easily workable. 

2. Attracts beneficial organisms

Organic matter provides a good source of food for soil-dwelling probiotics, fungi, earthworms, and other nitrogen-fixing organisms.

3. Helps retain moisture

Organic matter retains a lot of water, which keeps the soil moist and makes water more readily available to your plants.  Furthermore, it prevents soil crusting caused by dehydration, and reduces the need for constant watering. 

So, to sum things up, The best soil has an abundance of Organic Matter.

composting organic matter into humus

So, how can you increase Organic Matter in your soil?  How can you build healthy humus?

Try Composting!

Composting is easy and inexpensive, and it all starts with a pile of scraps.

 Some people advocate for fancy bins and special compost tumblers, but I like to keep composting simple and cheap. I just have an area in my garden partitioned off for compost, and piles of compost ripening right there on the bare earth.  I did use some left over wood to put a barrier around 3 sides of my compost pile.  This just keeps it heaped together in a nice pile, and prevents it from spilling out all over the place.  I usually have two piles in my compost area: one pile is ready-to-go humus (or almost ready), and the other pile is still freshly-decaying.

Composting scraps are divided into two categories--Green (Wet) Waste and Brown (Dry) Waste. 

Green Waste (full of Nitrogen):  vegetable or fruit scraps (no citrus rinds or onion), egg shells, coffee grounds and filters, tea bags (strings/staples removed), grass clippings (as long as they don't have any chemical residues on them)

Brown Waste (full of Carbon):  dried leaves, wood chips/sawdust, shredded newspaper, shredded paper, shredded cardboard, dried straw, wood ash (not charcoal)


NOTE: any scraps you add to your compost pile should be cut into smallish pieces. For example, if you're adding an uprooted pea plant to your compost, cut it into smaller segments.  Have some egg shells? Crush them up.  A piece of produce that has gone bad?  Chop it up. The smaller the pieces, the faster they'll compost.  And you also won't have to contend with big chunks in your finished product.

I'm not very scientific or technical in my compost measurements or ratios either--I just kind of eyeball it. If I bring out my bucket of kitchen scraps one day, then I try to match it within the next few days with a bucket of brown waste. If I throw in a bunch of pulled weeds, I balance it out with some shredded newspaper. And so forth. Then every week or so, I water my pile to wet it thoroughly and keep it activated, and turn it with a pitchfork.  After a few weeks, I start transferring the rich, dark brown product into my "Ready-to-go" pile. We are in a drought here, and have very hot, dry summers, so watering my compost pile is essential.  However, if you live in a cooler or more humid environment, you probably won't need to water your pile as often.  You don't want it soggy--just moist. Also, I have never had a problem with odor (and my pile is right under a window), but should your pile get stinky, you can add in some more brown matter and keep your pile aerated by turning it more frequently.

You know your compost is ready to be added into your garden when it is dark in coloration and has an earthy dirt smell to it.  In addition to my homemade compost, you also amend worm castings and composted steer/chicken manure, as these are also sources of organic matter. One of the benefits of amending and fertilizing your soil with organic matter is that you really can't use too much--if you put a lot of compost in your garden, your plants will love you and you aren't going to run the risk of burning your crops or over-fertilizing because organic matter is gentle.  I caution you, however, to be more conservative with manure applications, especially if it is on the fresher side. 

Happy Composting, and I hope your soil is in tip-top shape for planting your spring garden!

Monday, February 16, 2015

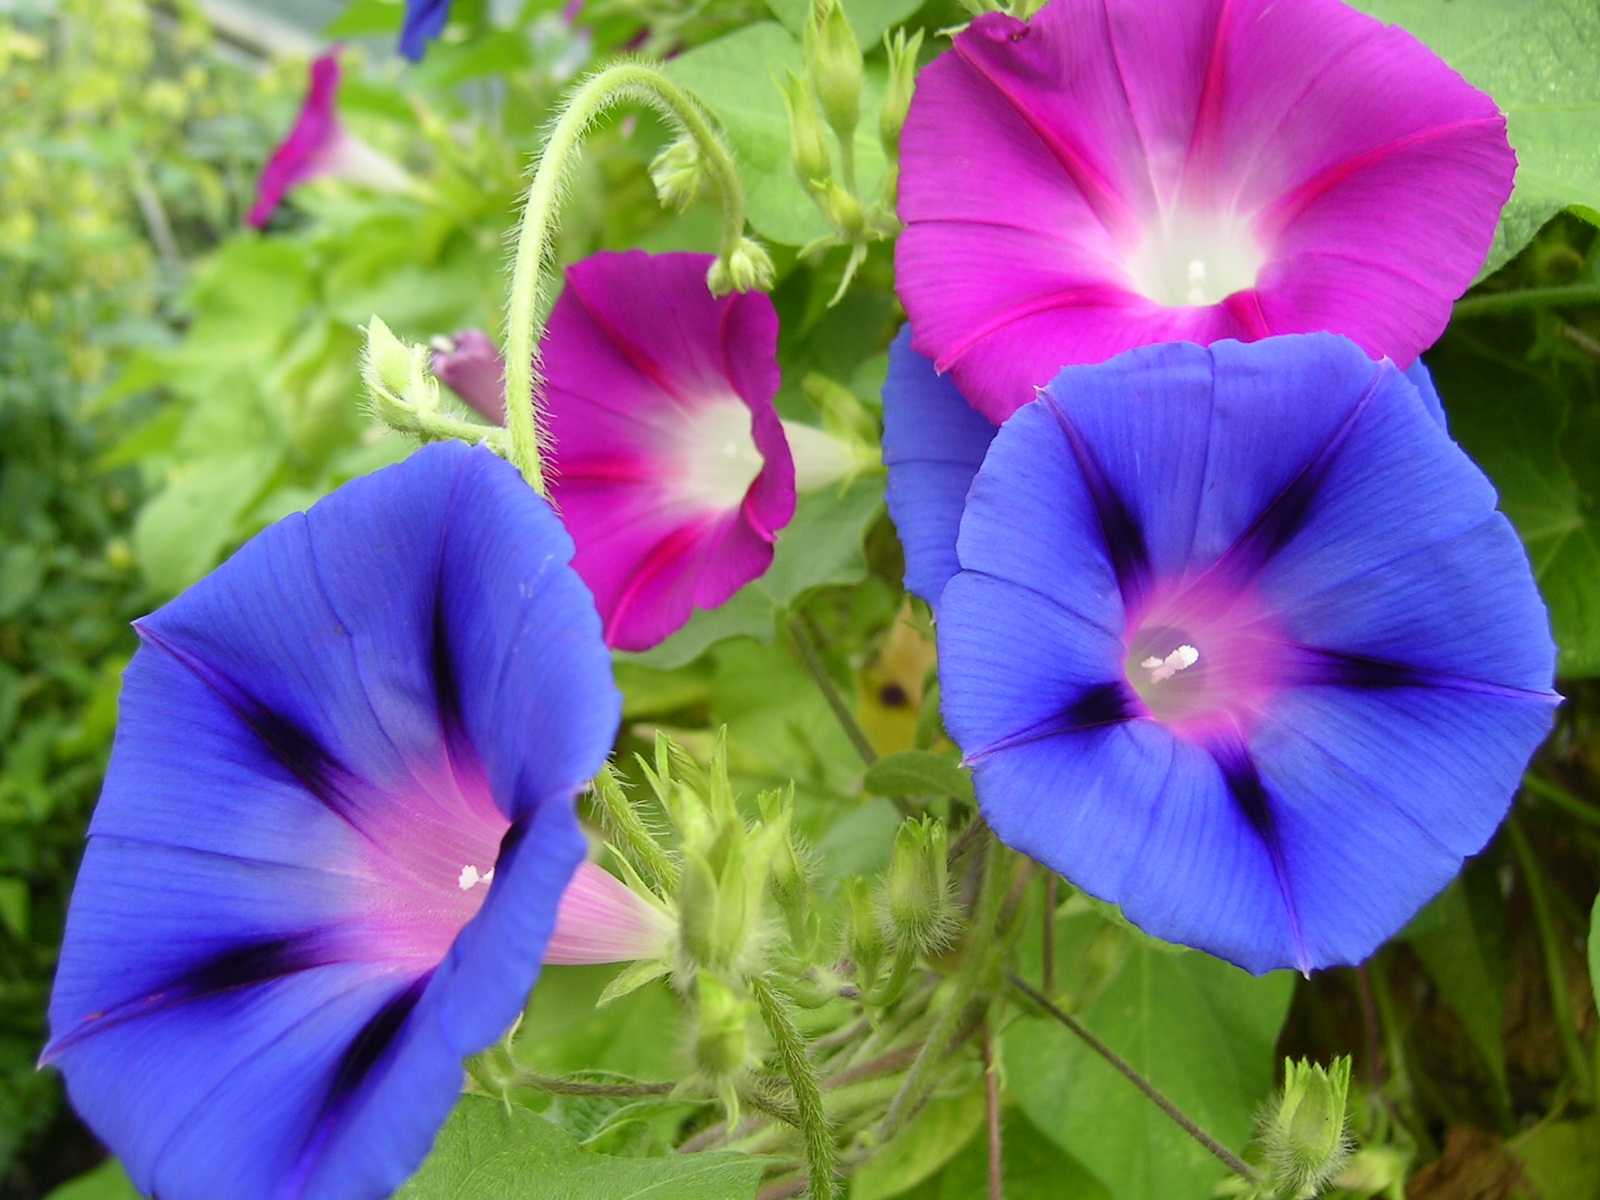
Morning Glories

I'm normally more concerned with growing practical things in my garden--namely, vegetables and herbs.  This year, however, I am branching out and growing some flowers in my backyard.  I've always adored Morning Glories, so I am most excited about the Morning Glories that I am planting from seed along a stretch of my back fence.  I'm not getting too carried away with flowers, because my vegetables take enough time and dedication, as is.  And also because the neighbors have a gigantic shade tree, which shades most areas of the backyard.

I ordered two variety packs of Morning Glory seeds from RareSeeds.com.  I'm already picturing how lovely they'll look next to my glider-swing.

vining trumpet variety flowers

Saturday, February 14, 2015

What to Grow: Grow What You Like to Eat

One of the most important things to consider when choosing what to plant in your backyard garden, is what you like to eat or what you would like to try eating.  Nothing is worse than growing a whole slew of veggies that you do not really care for.  And, let's be honest, sometimes there is just that one vegetable that no amount of added seasoning can make yummy.

For me, I don't care for beets or radishes.  I just think they are lousy.  When I first got interested in gardening, because they are easy-to-grow, I would plant them.  When they ripened, I would proudly pick them and admire their beauty, and then they would sit in my refrigerator, never-to-be-eaten.  I would try preparing them different ways, and sometimes I would nosh on them hoping to acquire a taste for them, but NOPE! I just do not like beets or radishes.  I could take a few to my co-workers or neighbors--if they would even take them.  Turns out, I'm not the only one who isn't impressed by beets or radishes.  And so, after watering and nurturing my beets and radishes, getting the satisfaction associated with pulling them up and washing all the dirt off them, there they would sit and shrivel in my fridge until, eventually, they would get chopped up and tossed in the compost bin.  What a waste! 

After much deliberation, I decided that I would not be growing beets or radishes again.  In fact, if I don't like it, I won't grow it.  There is no sense in growing a veggie in your backyard that sucks.  Now, in place of beets or radishes, I can grow more of my favorites--like these Green Beans, or try out new vegetables--like this Scalloped Yellow Squash. 


Wednesday, February 11, 2015

Sowing Suggestions: Broccoli


sowing suggestions broccoli

Broccoli is a nice, hearty vegetable to incorporate into your garden.  I reside in a Zone 9 area, with a very warm climate.  While broccoli doesn't enjoy the heat of summer, it thrives during late autumn and winter.  I appreciate the addition of broccoli to my fall/winter garden because it offers a different flavor and texture than a lot of the other greens I can grow in my winter garden.  And, as a bonus: It's always impressive to dinner company when you inform them that the roasted broccoli was grown in your own backyard!

I've outlined by Sowing Suggestions below.  Be sure to check them out if broccoli is something you would like to incorporate into your fall or winter garden.


Sow in a location that gets at least 5 hours full sun per day.

Germination: above 45 degrees F, faster if closer to 70 degrees F
Optimum temperature: 50-70 degrees F  (Broccoli has better flavor when it is grown in this cooler temperature range)
Freeze-tolerant: short periods of 20-32 degrees F (like overnight)
Danger zone: temperatures above 80 degrees F

Fertile soil, rich in compost. Throw in some manure to provide Nitrogen. Well-drained soil.  Can grow in slightly acidic to slightly alkaline soil, with a pH of 6.5-7.5.  Try to avoid growing broccoli in the same location for two years in a row--crop rotation is good.

You can either start seedlings indoors or sow directly.  I prefer direct sow, by planting 3 seeds every 18-24"(depending on variety).  Once the seedlings are 2-3" tall, pluck excess plants and leave only the healthiest seedling of the 3. Broccoli plants have very shallow roots so, if transplanting seedlings, try to plant a little below the soil line (~1" deeper), especially if they are leggy (tall, skinny, flimsy).  Transplant once the seedlings have at least 4 leaves.

Keep broccoli well-watered.  The soil should never dry out completely.  But don't water so frequently that the soil is soggy.   We are in a drought right now, and get no rain, so I water about 1-2 times per week. I do this deep, infrequent watering so as to encourage the roots to reach down further and become stronger.  If you water too frequently, the soil will get soggy and encourage rot.

To keep soil fertile and nutrient-rich, apply a fish emulsion or compost tea every 3-4 weeks.


First, you'll want to harvest the BIG head of broccoli--this is the main head of broccoli that grows from the top of the stalky stem of your broccoli plant.  It will appear first.  Harvest this head while it is still tightly bunched in the center, but starting too loosen on the outer edges--this indicates that it has grown to full size.  Harvest by cutting a few inches down the stalk (at least 5") and at a slight diagonal.  Cutting at a diagonal ensures that water will run off the residual stem rather than settle in it and potentially cause rot.

After the main head of broccoli has been harvested, other smaller heads of broccoli will start growing from other areas of the broccoli plant.  These secondary heads aren't nearly as large as the main broccoli head, but they add up and actually have a higher yield than the primary head.  I try and harvest them every few days by cutting them off.

Wash broccoli florets in cool water and allow them to dry completely, before storing them in the refrigerator. They will stay good for about a week in the fridge. I like to use a salad spinner to wash my florets, then dry on a paper towel for about an hour before transferring to the refrigerator.

*If your broccoli heads have hidden worms, you can wash them in the sink with a warm salt water solution.  Just fill sink basin with warm water and add in a handful of salt, and agitate the heads to coax out the worms.  Rinse, dry, and store in the fridge.


As with any home grown crop, you may experience some troubles with your broccoli.  I've outlined just a few of the problems you may come across and some probable solutions.  This is in no way a comprehensive list--I've only touched on a few common problems.

PROBLEM:  Seedlings start to grow and emerge, but end up eaten or die after they get a few inches tall
SOLUTION:  Some sort of pest or pathogen is killing your seedlings.  If the seedlings appear to be growing healthily at first, then end up eaten or cut off at the soil line, there may be cutworms nibbling on them.  Cutworms are small, grayish to brown worms (1" long)  that curl up and hide in the dirt around plants during the day, and come out to eat them at night.  Try and remove any visible cutworms and then put some sort of collar around your seedlings--plastic cups with the bottoms removed, toilet paper rolls, etc.  If the seedlings are struggling to even emerge, or dying shortly after emerging, it may be a pest or pathogen within the soil and you are probably better off planting your broccoli in another location, or starting the seedlings indoors and waiting until they are stronger to transplant outside.

PROBLEM:  Broccoli has little worms on it; Cabbage loopers, cabbage worms, cut/army worms, and other green caterpillars are eating holes in the broccoli foliage and hiding amongst the heads
SOLUTION:  If you only see a few worms, you can pick them off by hand and squish them.  If you see a lot, then you should apply BT Worm & Caterpillar Killer.  BT Worm Killer is not a chemical pesticide--so it is safe to use in your organic garden.  It is actually a bacteria known as Bacillus thuringiensis.  This bacteria targets only a few certain species of worms/caterpillars.  It has no effect on humans or beneficial insects such as lacewings, bees, or ladybugs. It kills the worms after they ingest it.  When they ingest the BT, it infects their digestive system leading to an inability to eat and eventual death.
 
PROBLEM:  Broccoli heads are very loose and open; broccoli is is suddenly getting yellow flowers
SOLUTION:  Broccoli tends to perform better in a cooler temperature range.  When the weather gets too warm, the broccoli heads begin to loosen up and go to flower much more quickly.  In other words, broccoli will bolt if the temperature (especially soil temperature) raises above 80 degrees F. If you are having a small heat wave in winter, like 2 or 3 days of 80 degree weather, you can try and reverse the negative effects of the heat by shading your broccoli plants and cooling the soil with slow watering and by adding a thick layer of mulch.  However, if it's the end of winter, it is probably time to plan a replacement for your broccoli--like some green beans!

PROBLEM:  Broccoli heads look like they have darker, softer patches on them
SOLUTION:  Indication of broccoli head rot.  To prevent this problem, avoid overhead watering of your broccoli, as this occurs when residual moisture sits on the growing broccoli heads and creates a breeding ground for bacteria.  Water around the base of the broccoli.  Also, try to pick a variety of broccoli with a more dome-shaped head, so the water runs off more easily.

broccoli bolted to broccoli flowers


Tuesday, February 10, 2015

Therapeutic Gardening

gardening quotes

It's true--anyone can be a gardener, or, as I like to call myself, an amateur farmer!

Stressed, and a bit depressed, at a time when nothing seemed to be working in my favor, I started a backyard garden with just a few essentials--tomatoes, green beans, zucchini, and yellow squash.  And slowly, my healthy distraction turned into a full-blown passion.

When I wake up in the morning, I put on my house shoes and trek out to my garden to see what progress has been made over night.  When I get home from work, I head out to my garden to admire it for a little while longer.  I lovingly water my plants, pull weeds, cultivate and fertilize the soil.  I turn my compost pile and water it so it stays active.  I examine each plant for ready-to-pick veggies and pesky visitors. And when a plant I love gets infested with bad bugs, I work with persistence to obliterate the enemy and resuscitate my plant-child.

Gardening has become my outlet for stress.  Some people run, some people drink, and some people take Prozac.  For me, though, I just head outside and play in the dirt.


How do you unwind at the end of a long day?

Friday, January 2, 2015

Reaping the Benefits of Home Gardening

The New Year provides one with the opportunity to start with a clean slate--so to speak.  The chance to begin again; to try something new; to make a change. If you only make one New Year's resolution this year, I strongly encourage you to Grow Something!  Anything!  Plant some tomato bushes; start an herb garden; grow some green beans; or, go all out and sow a backyard vegetable plot.

By growing something on your own, you will surely reap the benefits.  I can carry-on for days about the benefits of home gardening, but for now, I'll just leave you with 3 simple reasons:

1. Homegrown is better!


I'm sure you've heard it a hundred times--you may have even experienced it for yourself. Food grown in your own garden just tastes better!  Strawberries are sweeter; tomatoes have superior flavor; eggplants are less spongey. Instead of eating a mass-produced piece of produce that was sprayed with pesticides, picked before it was even ripe, transported in a truck for several hundred miles, and set in a grocery store until you purchased it, you can enjoy a piece of produce freshly-picked from your own garden.  You can also experience so much more variety!  I love looking for  new and unique plants to try.  This year, I'm planning on experimenting with cucamelons and blue tomatoes. The options are endless though--check out all the different varieties of growing options on Baker Creek Heirloom Seed Co.

2. Gardening is good for your soul!


"Idle hands are the devil's handiwork."  Luckily, gardening keeps you busy. It is a fun and sometimes addicting hobby!  The sense of accomplishment and enjoyment associated with tending to your own crops is great for your emotional well-being. And, your neighbors and co-workers will love you when you bring them excess garden goods.  

3. Gardening is good for your health!


Not only does gardening keep you busy and active,but it also is a chance for you to absorb some sunlight!  So many people are deficient in vitamin D these days from being inside all the time.  Go outside, plant some seeds, absorb some sunlight so you can make some vitamin D, and eat healthier, tastier vegetables. Don't think you like veggies?  Grow some--and you might be surprised! I've acquired a taste for many different vegetable varieties just by being a proud grower and tasting some of my garden's beautiful bounty.  I used to be a big tomato hater.  Now, its winter and I'm already fantasizing about what kinds of tomatoes I'm going to grow in the spring.

gardening quotes